How to Run a DiagnoseMyPc Fix Script
A friendly, step-by-step walkthrough — no tech knowledge needed.
What does a fix script do?
After DiagnoseMyPc analyses your PC, it can generate a short PowerShell script for each issue it finds. The script runs the exact Windows commands needed to fix that issue — things like clearing temp files, resetting a stuck Windows Update, or repairing corrupted system files.
Safety first. Every script creates a System Restore point before making any changes, so you can always undo the fix if needed.
You can click Preview on your report to read the entire script before you run it — nothing happens until you choose to proceed.
Scripts are optional. Every issue also has written Resolution Steps you can follow by hand if you prefer not to run a script.
Before you start
You need to be signed in to Windows with an account that has administrator rights (most home PCs do by default).
Save any open work — some fixes ask you to restart your PC at the end.
The whole process takes 1–5 minutes depending on the fix.
Method 1 — Copy and paste
This is the quickest and easiest way. You copy the fix from your report and paste it straight into PowerShell.
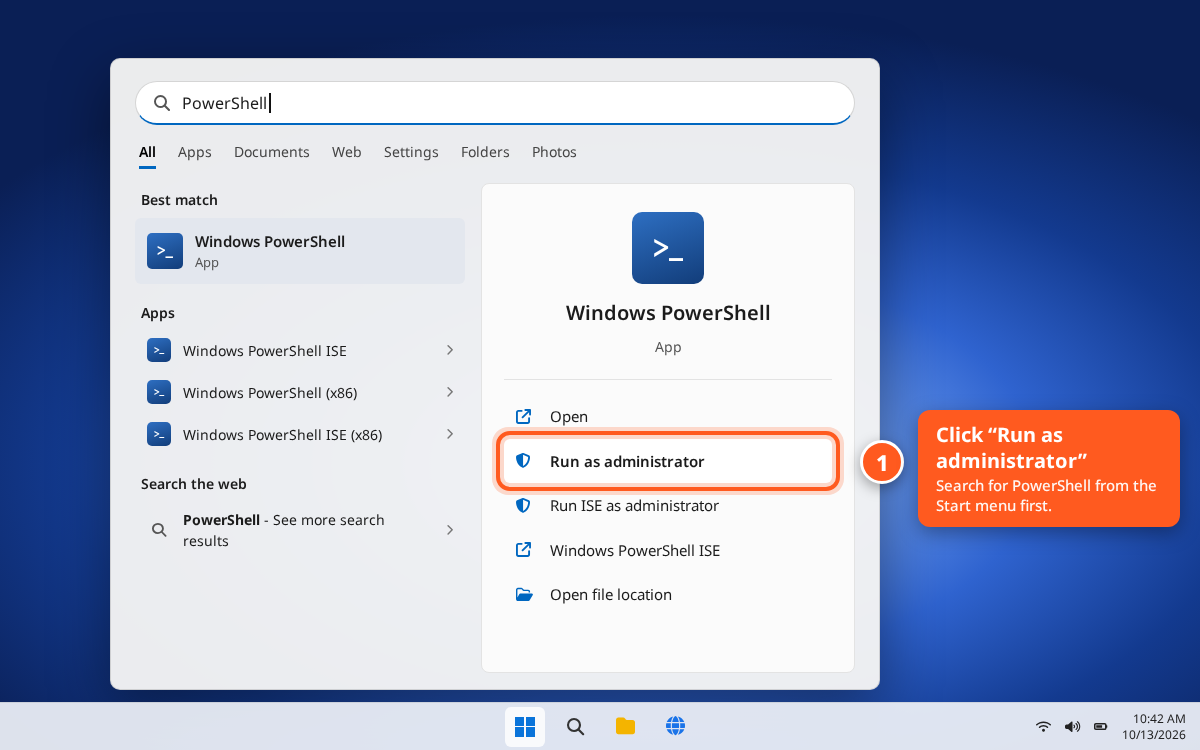
1Open PowerShell as Administrator
Click the Start button (or press the Windows key), type PowerShell, then click "Run as administrator".
 Click to enlarge
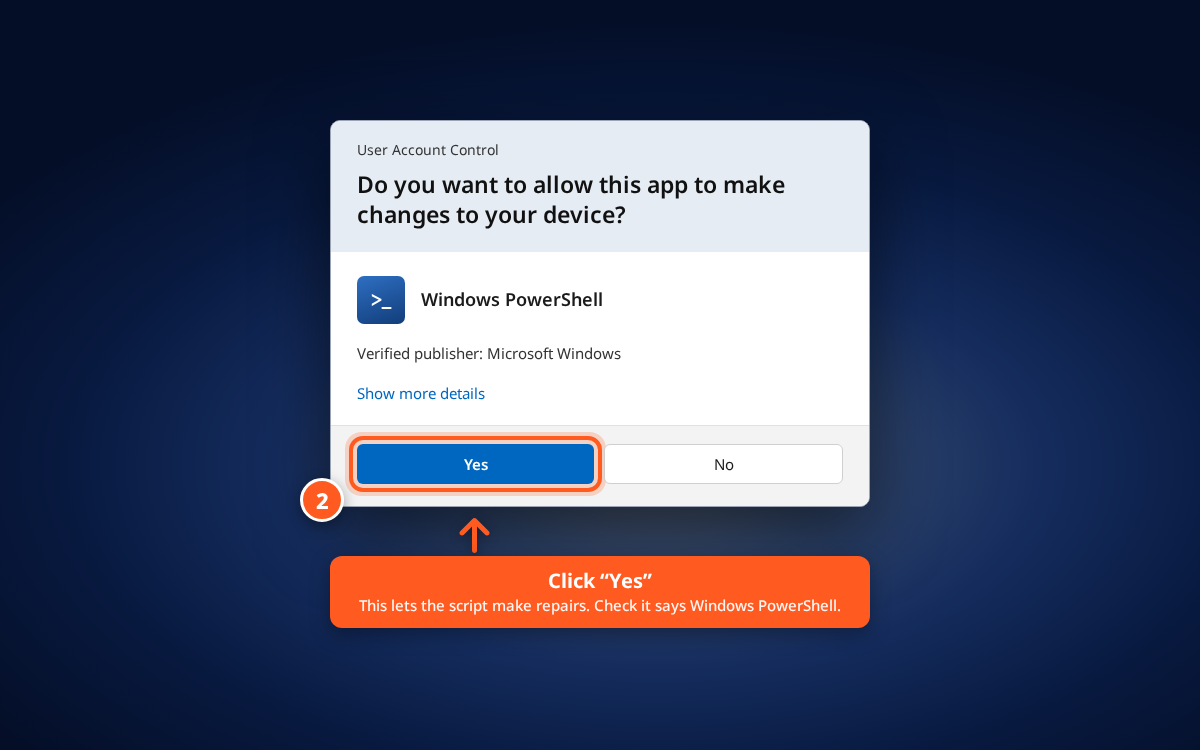
2Click Yes on the admin prompt
Windows will ask "Do you want to allow this app to make changes to your device?" — click Yes.
 Click to enlarge
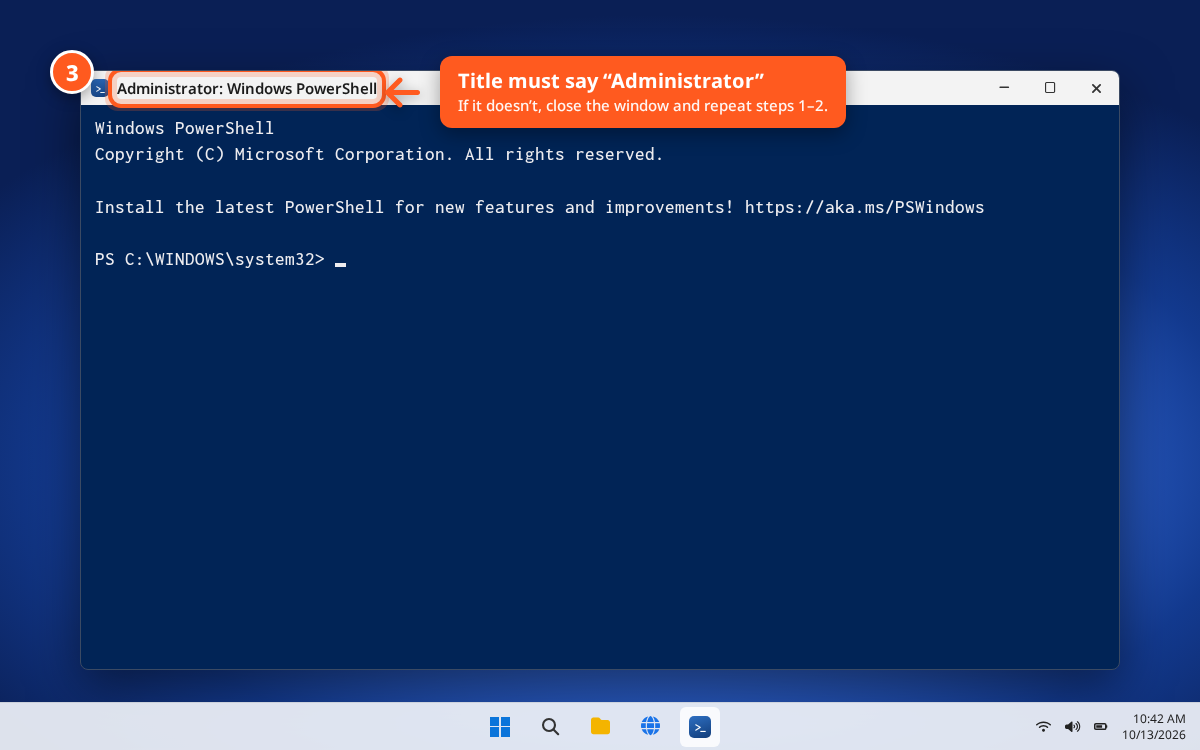
3Check the title bar
The window that opens should say "Administrator: Windows PowerShell" in the title bar. If it just says "Windows PowerShell" without "Administrator", close it and try Step 1 again.
 Click to enlarge
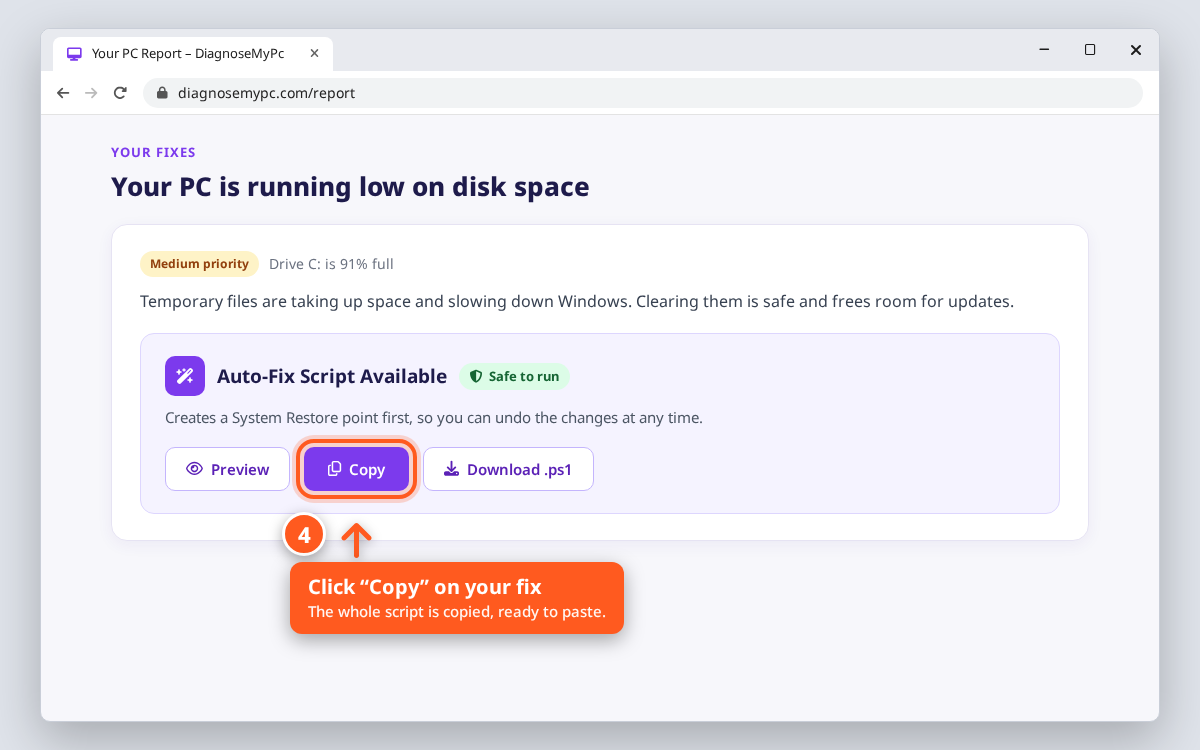
4Copy the fix script
Go back to your DiagnoseMyPc report in the browser. Find the issue you want to fix and click the Copy button on the fix-script panel.
 Click to enlarge
5Paste and run
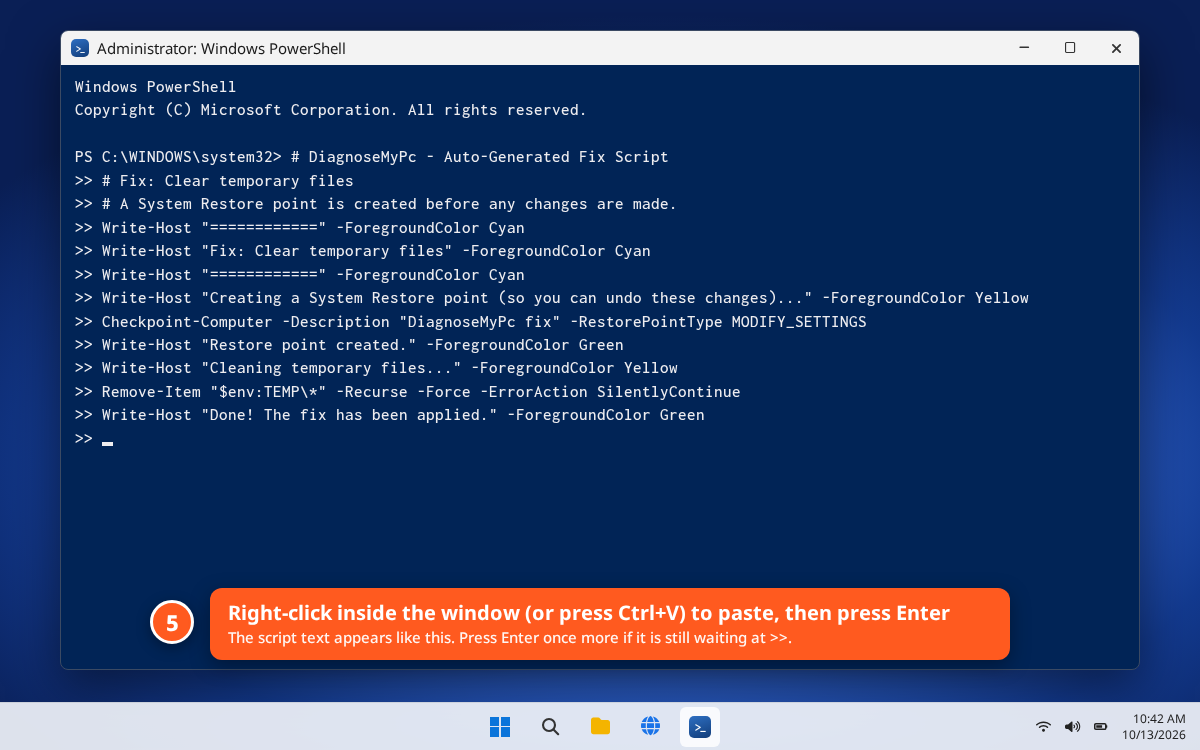
Click inside the blue PowerShell window, then right-click (or press Ctrl+V) to paste the script. Press Enter to start it.
If the prompt changes to >> instead of running, just press Enter one more time.
 Click to enlarge
6Wait for the restore point
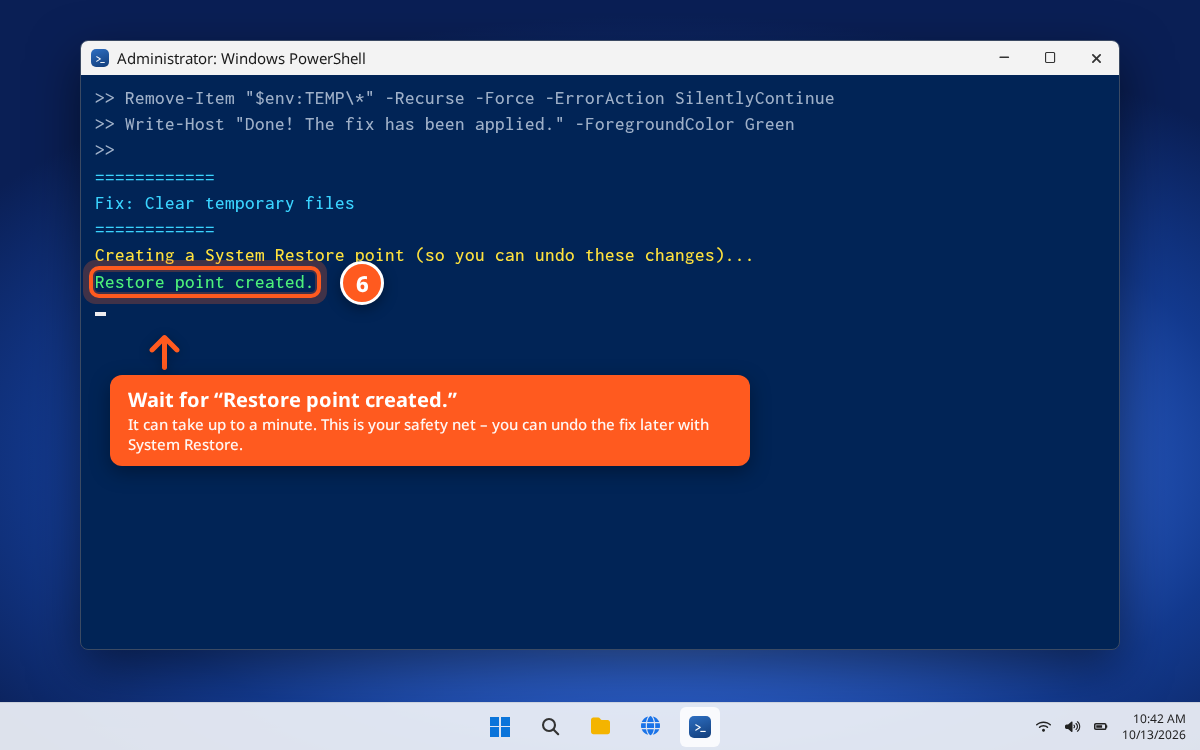
The script starts by creating a System Restore point. This takes a few seconds. If it succeeds, you'll see a green message and the fix will continue automatically.
If it can't create a restore point (for example, if System Protection is turned off), it will ask:
Continue WITHOUT a restore point? (y/N)
- Type y and press Enter to continue anyway (the fix will still work, you just won't have an automatic undo option).
- Press Enter without typing anything (or type N) to stop the script. No changes will be made.
 Click to enlarge
7Done — look for the green text
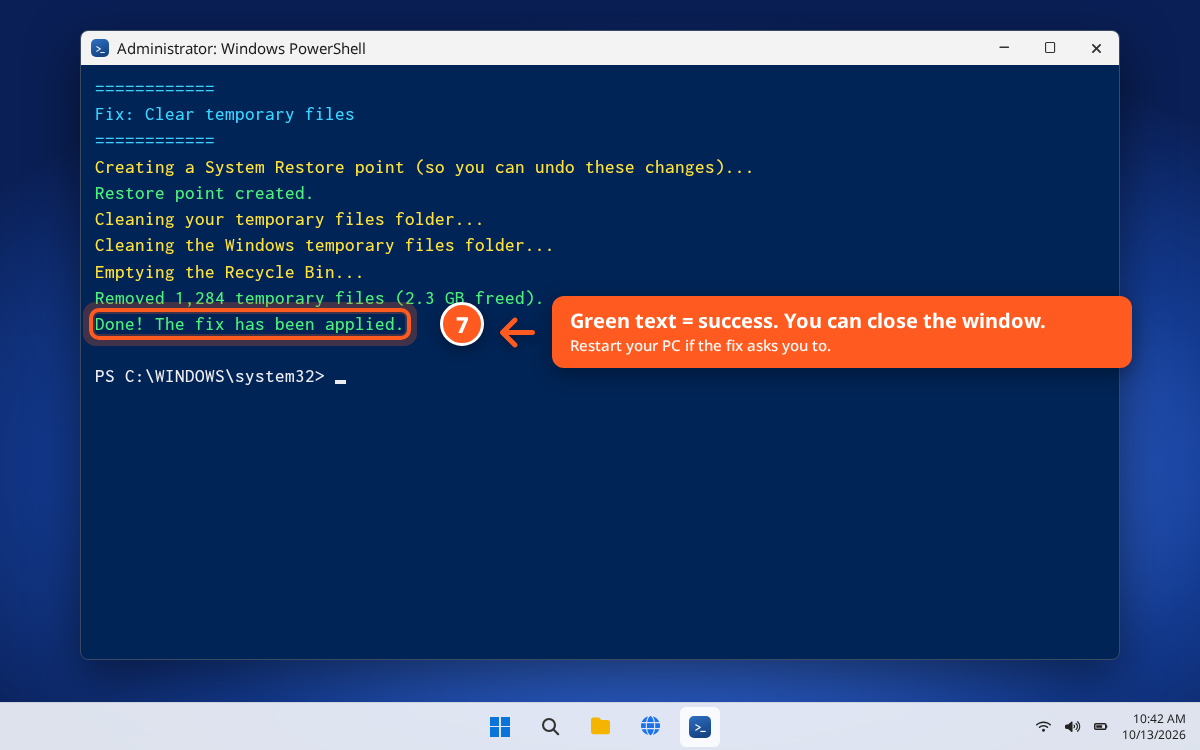
When the script finishes, you'll see green text saying "Script complete!". Close the PowerShell window and restart your PC if the script asks you to.
 Click to enlarge
Method 2 — Use the downloaded .ps1 file
If you prefer to save the script as a file first, click Download .ps1 on your report. Note: double-clicking a.ps1 file usually just opens it in Notepad — it won't run. Follow the steps below instead.
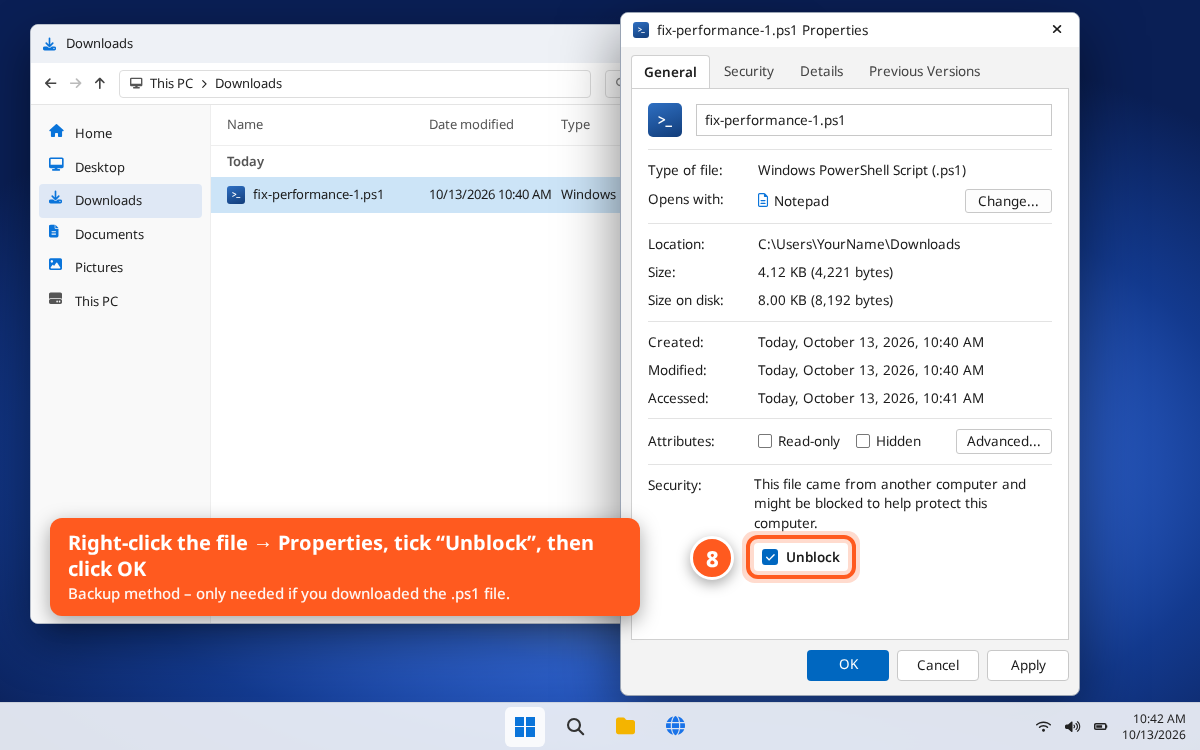
AUnblock the file
Right-click the downloaded file → Properties → tick the Unblock checkbox at the bottom → click OK. This tells Windows you trust the file.
 Click to enlarge
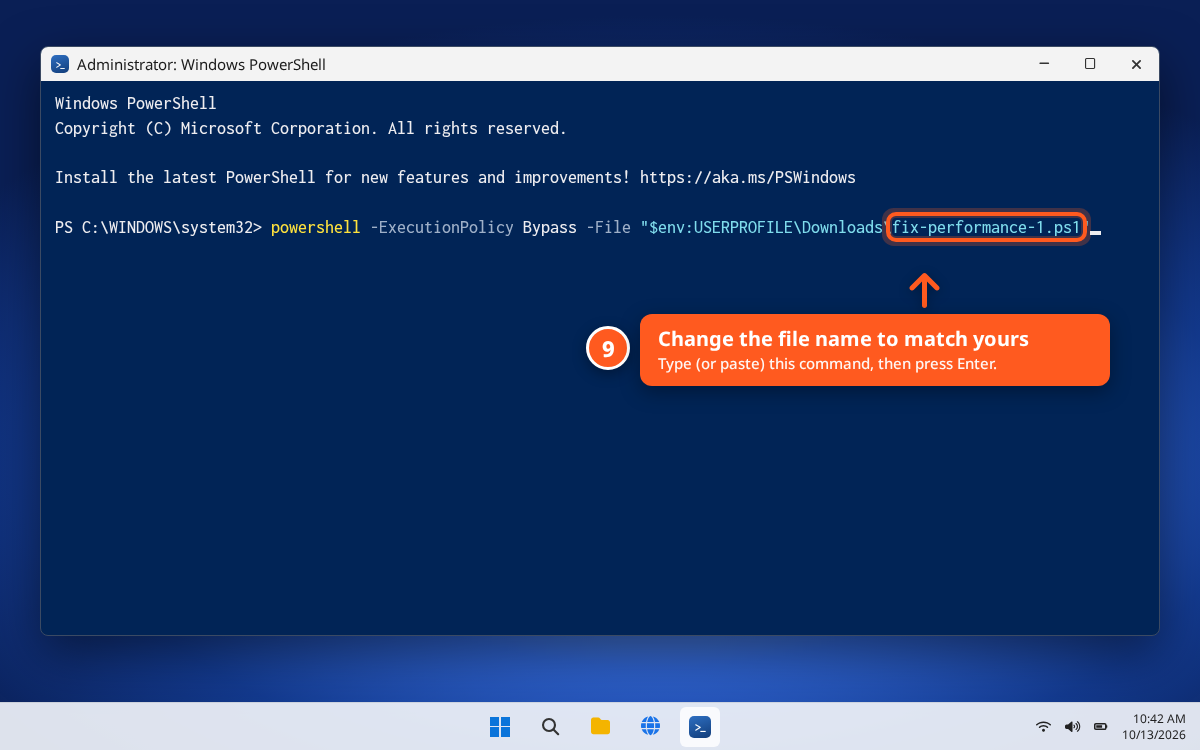
BRun it from Administrator PowerShell
Open PowerShell as Administrator (same as Method 1, Steps 1–3), then paste the command below and press Enter. Replace <your file name> with the actual file name (for example fix-network-1.ps1).
powershell -ExecutionPolicy Bypass -File "$env:USERPROFILE\Downloads\<your file name>.ps1"
The -ExecutionPolicy Bypass flag lets this one script run without changing your system-wide policy. It only applies to this single run.
 Click to enlarge
Troubleshooting
The screenshots on this page are illustrations. Your screen may look slightly different depending on your version of Windows and your display settings.